|
|
enjoying the great outdoors |
||||||||||||||||||||||||||||||||||||
|
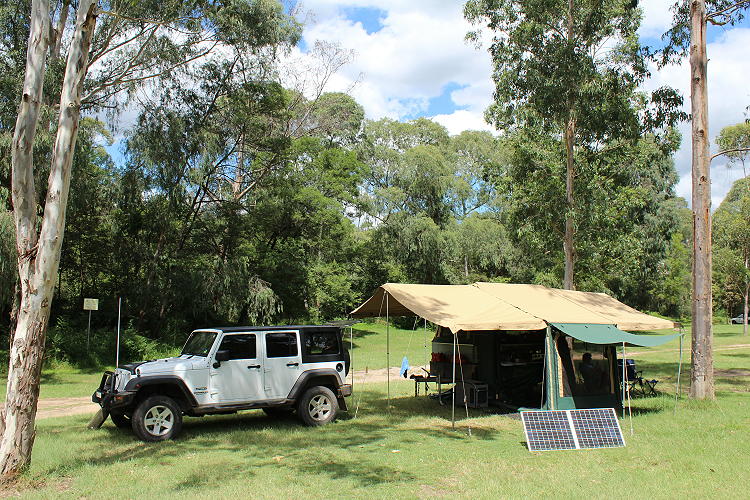
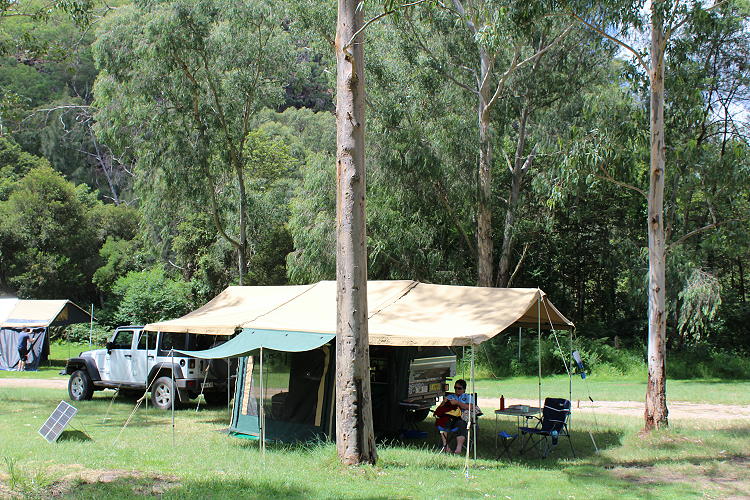
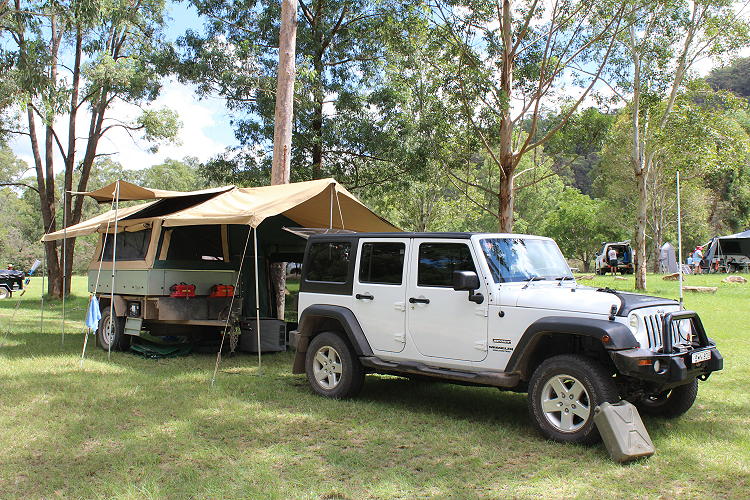
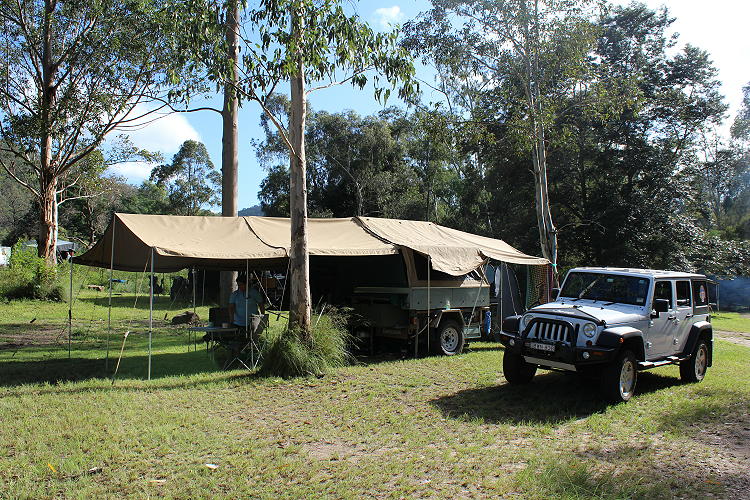
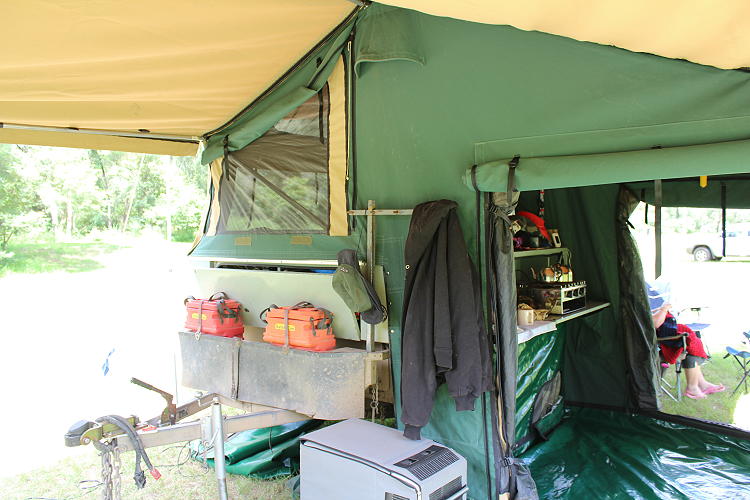
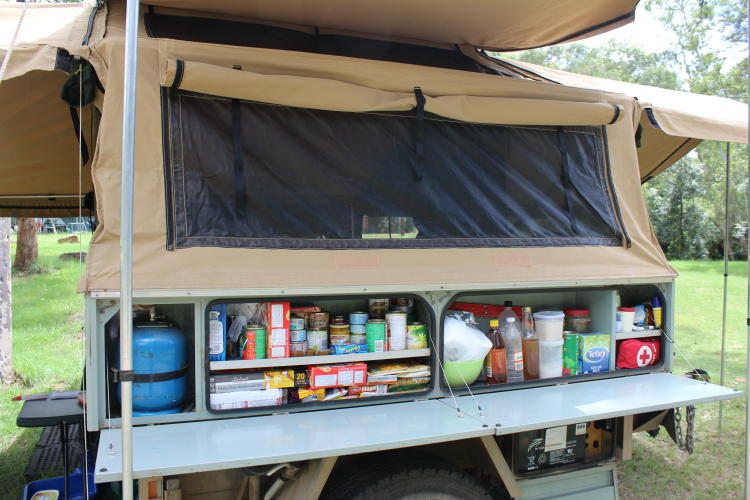
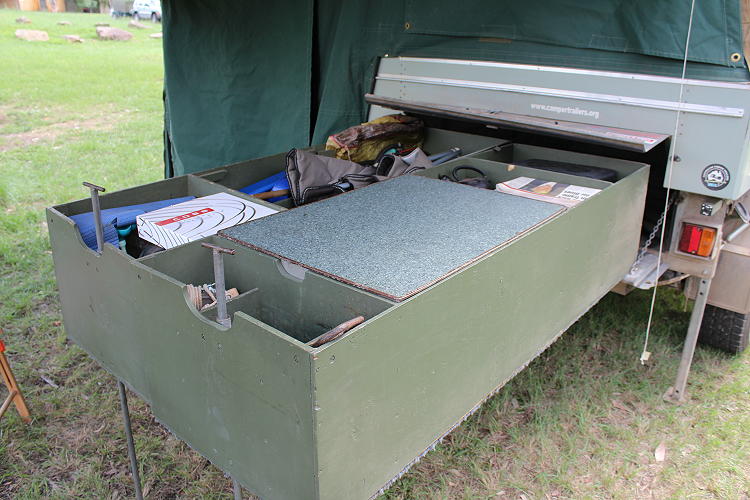
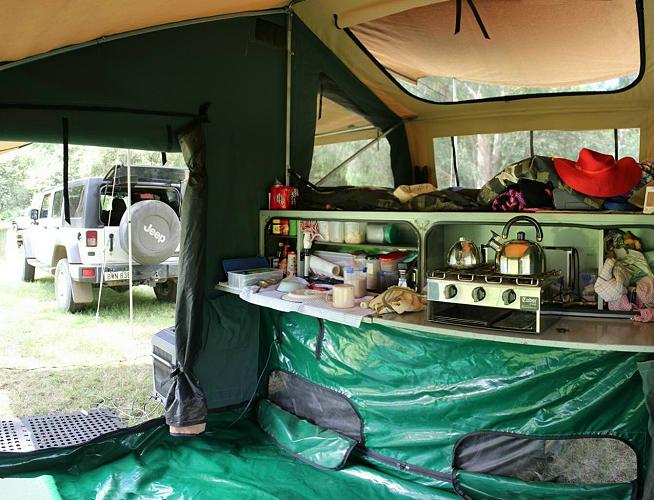
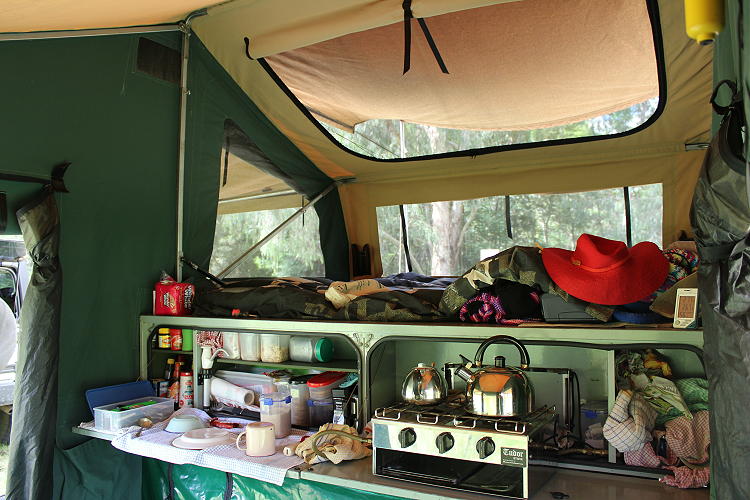
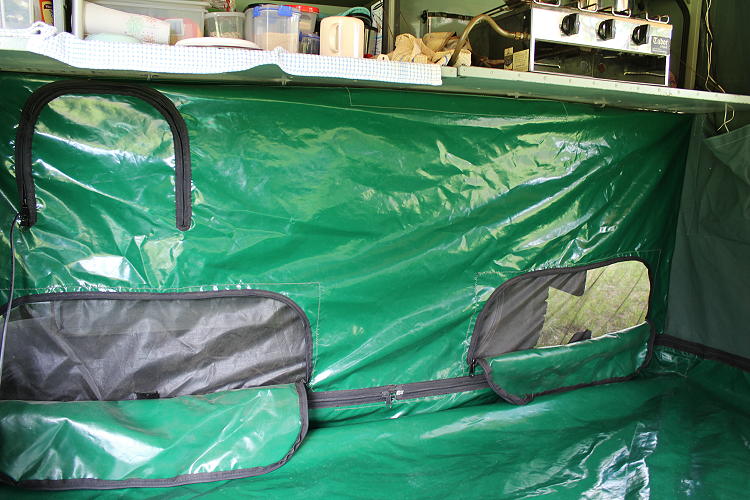
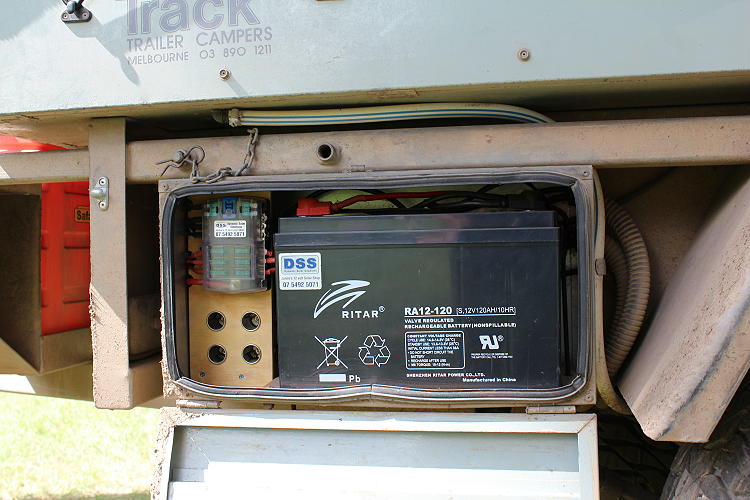
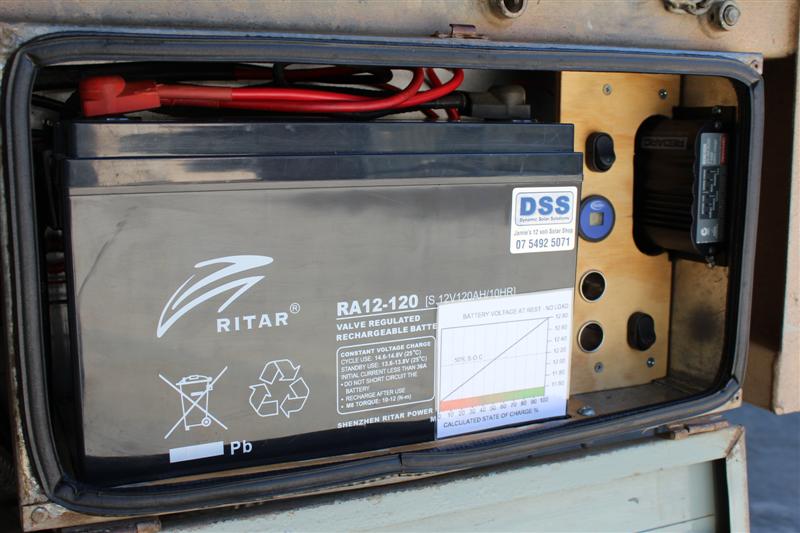
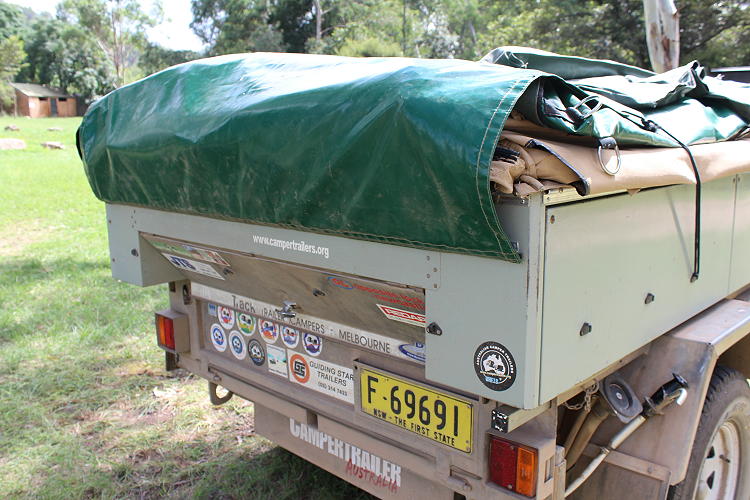
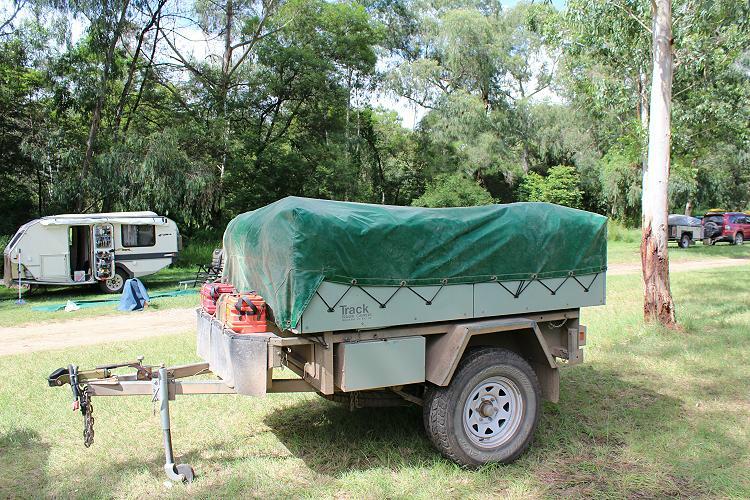
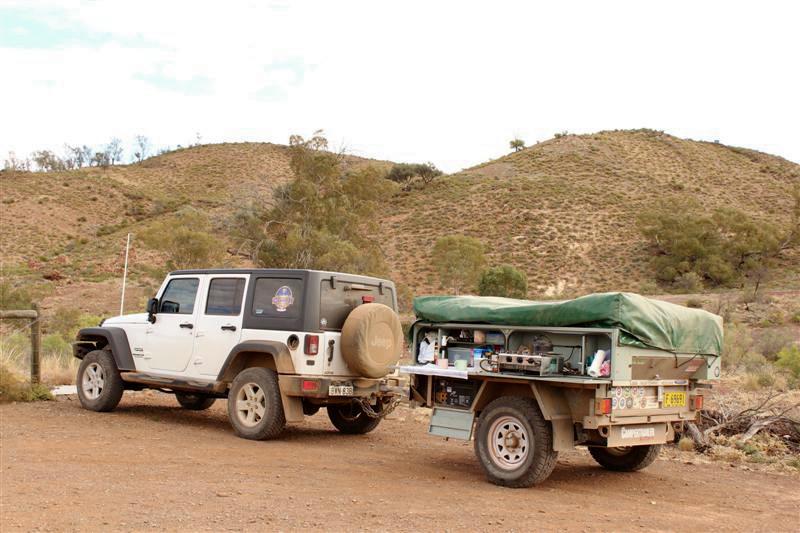
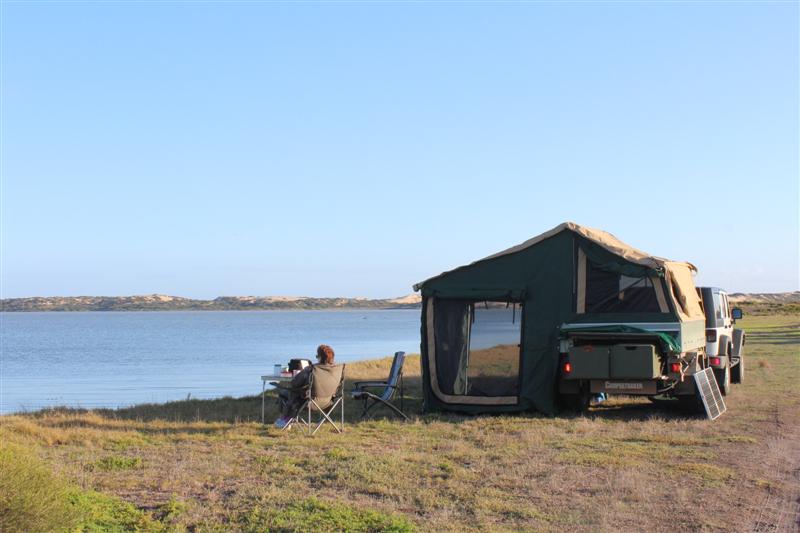
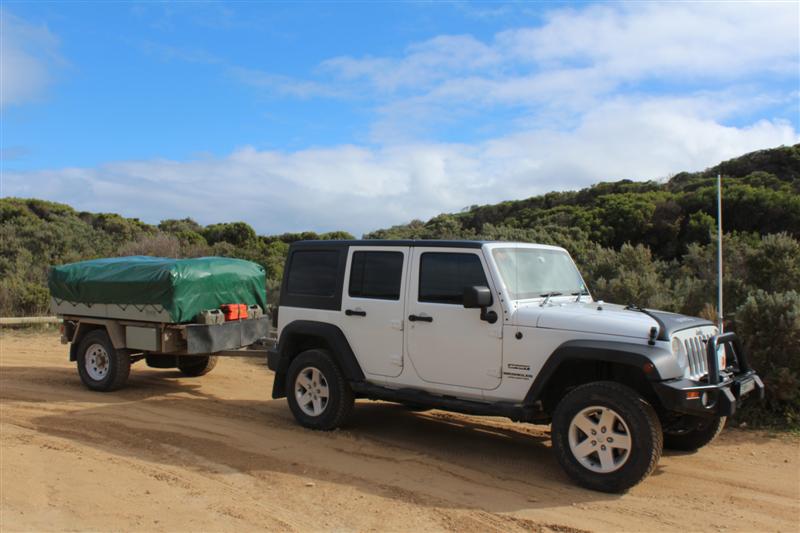
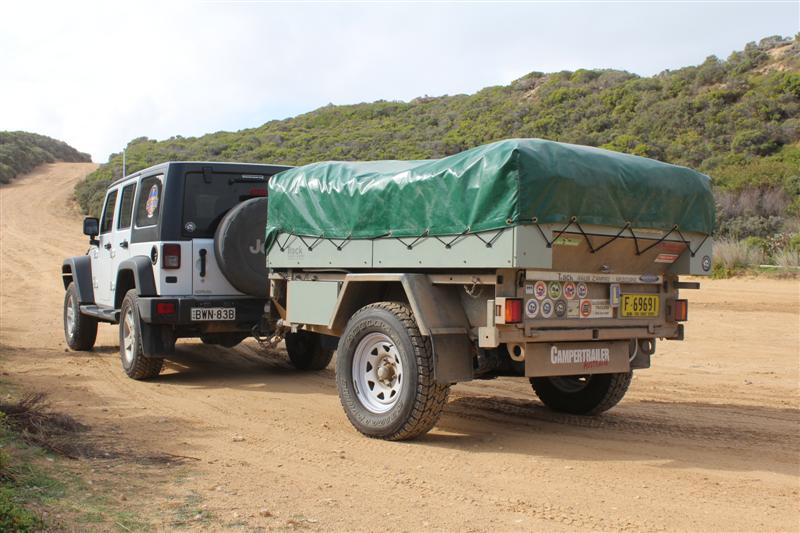
We picked up our 1990 built pre-loved Track Trailer Eagle two weeks before Easter 1993. The camper was owned by the Track Trailer agent here in Newcastle. Back in those times it wasn't uncommon for someone to make their camper available for inspection to a prospective buyer as an agent of the manufacturer. They were selling their Eagle & moving to a rear flipover hardfloor which had easier access to the bed. After all these years we are still very happy with our Track Trailer Eagle & seeing there was nothing that really caught our eye for an upgrade, we thought last year we would give it a birthday & put new canvas on. What really makes the camper for us is the dust proofed locker system making for easy storage, plus the 6ft x 4ft trailer storage area. There were plenty of changes & ideas we had thought of over the years that would make for a more comfortable camper trailer. All Terrain Camper Trailer's 10foot model was very close to what we had in mind & with a few tweaks we would have a camper that suited us down to the ground. We had a chat with Glen & Trish about our needs & a plan was devised. The internal floor space is around a metre wider than the original Eagle tent, giving us more space for a table & two chairs when having a meal out of the weather with the lockers open to the internal kitchen. The zip out floor is made from heavy duty vinyl & is a great idea for removing to hose over after camping in wet & muddy conditions. The new camper tent is made from Australian made 14oz Wax Converters canvas & has plenty of ventilation via the large midgee mesh windows in each wall. The large windows also allows plenty of light inside giving it an open airy feel. All window awnings are zipped from the outside & with velcro tabs across the bottom. The moon roof allows any heat to escape on a hot day while drawing cooler air from under the trailer itself via vents in the PVC drop off the camper. There is a clear PVC cover on the main side window that can be rolled down to provide light inside the tent area on rainy days. We wanted large screened doorways each end that open onto the awnings front & rear, plus a third awning that can be zipped on either end. Coupled with these & with four walls, provide plenty of shelter from the sun on a hot day or a large dry area when the rain sets in. We leave the rear awning on all the time & lift it onto the main roof with a tent pole, then dragging it over the top with two permanently attached ropes on the corners. If staying overnight we can pull the awning out in quick time when needed depending on the weather. We only zip the front awning on if staying for a few days. The two awnings have proved useful if the weather blows up. The dust proofed locker system is built using monocoque construction techniques & sits on top of the trailer. The two lockers on the drivers side make an ideal food pantry, while the two passenger side lockers, which are inside when the tent is erected, are the hub of the kitchen with stove, crockery & cutlery. The kitchen is easy accessible for a quick roadside stop by lifting up the travel cover. The front locker holds our spares, tools & 12volt leads etc. I have added extra shelving to all the lockers providing better packing & also making it easier to find the item you are looking for. The foam bed sits on top of the camper between the lockers ready made. We prefer fitted sheets & have a woolen underlay with a down duner over the top for winter warmth. I built two large ply boxes that slide into the rear of the six foot long box trailer. This provides a huge additional storage space for our clothes, cooking, camping gear etc. The maintenance free, hot dipped galvanised, off road Guiding Star trailer is virtually bulletproof & has not let us down despite the punishment it has received over the years. The chassis is fabricated from RHS with a 3mm wall thickness while the 60 series Landcruiser leaf suspension comprises of seven leaf springs by 70mm wide with an eye to eye measurement of 1040mm. Those travelling behind us are amazed at how well the trailer behaves. The Koni shocks were a little long in the tooth with one leaking, so I replaced them with Tough Dog shocks, the stroke & compression of which matched the front end of a Landrover. The suspension combination works extremely well in all road conditions. Off road the trailer is well behaved & negotiates tight situations easily owing mainly to the short draw bar & rear set axle. While we did not have a complaint with the nine inch hydraulic overrider brakes, we did have to replace them as we could not open the rear door of our new Jeep JK Wrangler when hooked up because of the hydraulic master cylinder's position on the trailer. I installed a 10 inch electric braked Vehicle Components 45mm square axle that is rated at 2 tonne because of the parallel bearings used. The original 45mm square axle used Holden tapered bearings & was rated at 1.3 tonne. I also installed a Redarc EBRH brake controller with remote head. With limited room in the JK Wrangler the EBRH was the perfect choice. The main body is mounted in the dash cavity while a dial & small light is the only visible controls you have on the dash itself. Even after raising the rear door mounted spare on the JK Wrangler we still had to push down the Tbar on the reliable 20 year old Treg coupling to clear it. There was only one solution & that was a new low profile coupling. I installed a Vehicle Components DO35 V2 coupling which has proved a pleasure to use. The second version incorporates a dust cap. I also installed a Vehicle Components side mount handbrake. A removable rack sits across the front of the trailer that carries three 20 litre jerry's of either water or fuel depending on the trip. The 60 litre water tank is situated under the rear of the trailer, encased in a steel protective cover, supplying water through two hand pumps, one in the kitchen locker & the other located on the rear outside drivers side guard. There is a battery box on each side of the trailer & I managed to squeeze in a 120 amp hour AGM battery into each. The passenger side box has access when the camper in erected through a zipped door in the PVC side drop. There is a six fuse outlet which has both a positive & negative bus bar for easy connection to outlets. Seeing most 12volt accessories come with a cigarette lighter plug, we have found them ok for the low drawing accessories we use around camp. Each 12volt socket has a short run in 5mm auto cable & has its own fuse. The drivers side locker has the Redarc BCDC1225 DC-DC charger along with a voltmeter. The BCDC1225 charges the camper trailer batteries from the vehicle's alternator while driving using multi stage charging technology & when camped using the MPPT side of the charger via our portable 130watt Kyocera panel. A 240volt 25amp charger maintains the batteries at home. Dust entry under the travel cover had always been a problem mostly due to the way the bungie cord was used to secure it. I came up with the idea that if a PVC skirt was placed across the back under the travel cover slotted into a length of sail track, this would prevent the canvas being covered in dust. After many kilometres of dirt road this has proved successful. The front also had a
similar problem. I had a length of PVC sown above the bungie cord. The skirt
then wraps under the leading edge of the camper & is once again held in
place with bungie cord. Simple & effective.
a collection of photos - http://www.robcaz.net/more_track_pics.htm trailer draw sliders - http://www.robcaz.net/sliding_draws.htm water transfer - http://www.campertrailers.org/robs_water_transfer.htm redarc bcdc1225 charger install - http://www.campertrailers.org/bcdc1225_install.htm redarc bcdc1225 feedback - http://www.campertrailers.org/bcdc1225_feedback.htm
enerdrive battery
monitor -
http://www.campertrailers.org/enerdrive_elite.htm watts up meter - http://www.campertrailers.org/watts_up_meter.htm korr lighting kit - http://www.campertrailers.org/korr_lighting.htm 40 litre Engel power draw - http://www.campertrailers.org/fridge_draw.htm campertrailer mag writeup - http://www.campertraileraustralia.com.au/features/technical/1310/diy-camp-battery-systems/ buying a camper trailer article - http://www.gocampingaustralia.com/campertrailer.html
|
|||||||||||||||||||||||||||||||||||||